Ready to protect your cargo without spending a fortune? You’ve come to the right place.
In this guide, we’re diving straight into two DIY truck bed tonneau cover methods that’ll keep your stuff safe and dry.
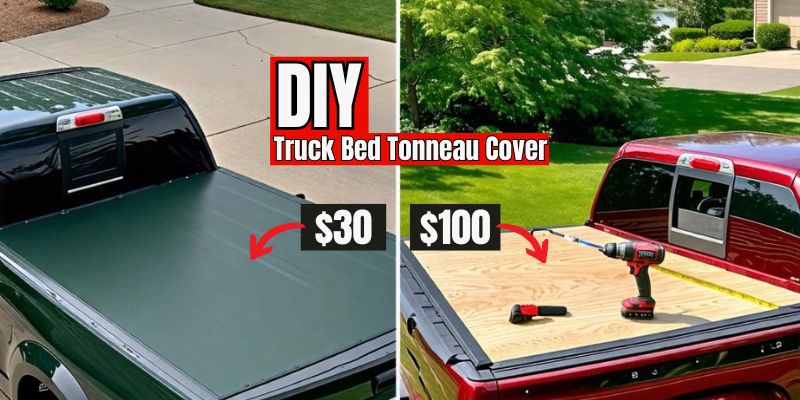
Whether you’re working with a $100 budget or looking for an ultra-cheap $30 solution, we’ve got you covered.

These step-by-step instructions are perfect for beginners and will allow you to build your own custom tonneau cover in no time.
Let’s jump right in and transform your open truck bed into a secure, weather-protected cargo area!
But wait, if you’re looking to buy an affordable tonneau cover, the Gator SFX Tri-Fold Soft Folding Tonneau Cover is a great option. It’s just $239 at Realtruck.com.
Or, you can grab the Tyger Auto T3 Soft Tri-Fold Truck Bed Tonneau Cover on Amazon.com for only $229.
Note: These prices were accurate at the time this article was published.
How To Make a Custom Tonneau Cover
Option 1: The “I’ve Got a Few Bucks to Spare” Tonneau Cover (Under $100)
Alright, let’s start with the fancier option. This method will give you a sturdy, good-looking cover that’ll make your buddies think you spent way more than you did.
We’re talking about a wooden cover that’ll keep your stuff dry and secure.
What You’ll Need:

- 2 sheets of 1/2 inch plywood (the smooth kind, not the rough stuff)
- 14 feet of 1×1 angle iron (don’t worry, we’ll explain what this is)
- Some bolts and wing nuts (these are the twisty things you can turn with your fingers)
- A saw (a handsaw works, but a power saw is easier if you’ve got one)
- A drill (your dad probably has one you can borrow)
- A tape measure
- A pencil
- Safety glasses (because you’ve only got one set of eyes!)
- Work gloves (to avoid splinters and cuts)
- A welder (optional – don’t sweat it if you don’t have one)
Step-by-Step Guide:
Measure Your Truck Bed
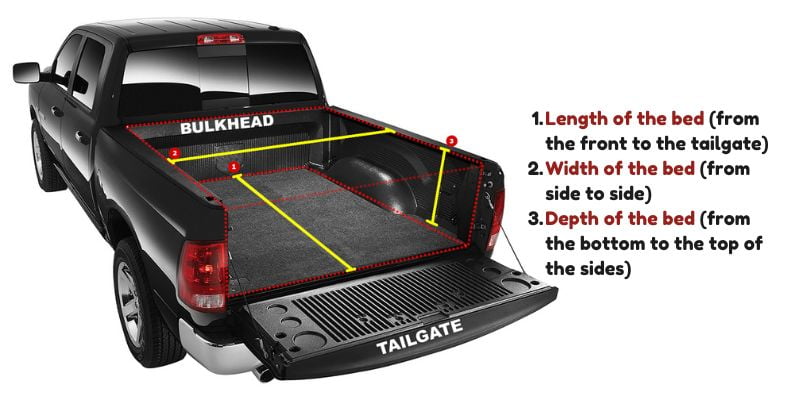
Okay, first things first. We need to know exactly how big your truck bed is. Grab your tape measure and get these numbers:
- Length of the bed (from the front to the tailgate)
- Width of the bed (from side to side)
- Depth of the bed (from the bottom to the top of the sides)
Write these numbers down – they’re super important!

Cut the Plywood
Now for the fun part – let’s cut that plywood!
- Lay the plywood sheets in your truck bed.
- Use your pencil to draw lines where you need to cut. You want the wood to fit just inside the bed, sitting on top of the sides.
- Remember that curve at the front of your bed? Yeah, you gotta cut that too. Take it slow and steady.
- Use your saw to cut along the lines. If you’re using a handsaw, take breaks if your arm gets tired!
Get Your Angle Iron Ready
Angle iron is like a metal L-shape. It’s going to support your plywood.
- Measure the length of your truck bed again.
- Cut two pieces of angle iron to this length. If your bed is longer than 7 feet, you might need to connect two pieces.
- Now, drill some holes in the angle iron. Make three holes on each piece, spaced out evenly.
Attach the Angle Iron to Your Truck
This part’s important, so pay attention!
- Place the angle iron on the side of your truck bed. The bottom of the L should be facing up.
- Line it up so the plywood will sit right on top of it.
- Mark where you need to drill holes in your truck bed.
- Drill those holes (carefully!)
- Bolt the angle iron to your truck bed. Make sure it’s super tight!
Test Fit the Plywood
Let’s make sure everything fits before we go any further.
- Place your cut plywood pieces on top of the angle iron.
- Check if there are any spots that need trimming or adjusting.
- If anything’s off, now’s the time to fix it!
Create Mounting Points
This is how we’ll attach the cover to the truck:
- With the plywood in place, mark spots for holes. You want at least one near each corner and maybe one in the middle of each side.
- Take the plywood off and drill holes where you marked.
- Now, here’s where it gets a bit tricky. If you have a welder, weld a bolt to the bottom of the angle iron at each hole. The bolt should stick up through the hole in the plywood.
- If you don’t have a welder, don’t worry! You can use regular nuts and bolts. Just make sure they’re tight and won’t come loose.
Make It Look Cool (Optional)
Want your cover to stand out? Try this:
- Use a blowtorch to lightly burn the wood. This gives it a cool, rustic look.
- Once it’s cooled down, apply some clear coat to protect it from the weather.
- If torches aren’t your thing, you could paint it or cover it with marine-grade vinyl instead.
Put It All Together
We’re in the home stretch now!
- Place your plywood pieces back on the truck.
- Line up the holes with the bolts or screws.
- Use wing nuts to secure everything. Wing nuts are great because you can remove them without tools when you need to take the cover off.
Boom! You’ve got yourself a custom tonneau cover that looks great and didn’t cost a fortune. Pat yourself on the back – you’ve earned it!
Video tutorial:
Option 2: The “I’m So Broke, My Wallet Squeaks” Tonneau Cover (Under $30)
Alright, for all you penny-pinchers out there, this next method is for you. We’re talking super cheap, super easy, but still gets the job done.
It might not win any beauty contests, but it’ll keep your stuff dry, and that’s what counts, right?
What You’ll Need:
- A 7×9 ft tarp (camo looks cool, but black works too)
- Some 2×3 lumber (that’s the skinny stuff)
- Screws (get the 3/4 inch ones with big heads)
- A drill
- A saw
- Measuring tape
- Pencil
- Safety glasses (safety first, folks!)
Step-by-Step Guide:
Measure and Cut the Lumber
First, we need to make a frame for our tarp to sit on.
- Measure the length of your truck bed.
- Cut two pieces of 2×3 to this length.
- If your truck bed is wider than 4 feet, cut a third piece to go across the middle.

Install the Frame
Now we’re going to attach that wood to your truck.
- Lay the 2x3s in your truck bed, about half an inch from the edge.
- Mark where you need to drill holes.
- Drill pilot holes through the wood and into the truck bed. Be careful not to drill through the bottom of your truck!
- Secure the wood with bolts. If your truck has a double-walled bed, make sure your bolts aren’t too long.
Prepare the Tarp
Time to get that tarp ready!
- Unfold your tarp and drape it over the truck bed.
- Make sure it’s centered and even on all sides.
- Find a seam or fold in the tarp that runs across the truck bed. We’ll use this to make our cover extra strong.
Attach the Tarp
This is where it all comes together.
- Start at one corner. Fold the edge of the tarp under and secure it with two screws.
- Move along the side, pulling the tarp tight as you go. Put a screw in every foot or so.
- When you get to that seam we talked about, fold it over to make a double layer. This gives extra strength.
- Do the same thing on the other side.
Finish the Back
The tailgate area needs special attention.
- At the back corners, wrap the tarp around and under. This prevents water from getting in.
- Secure these corners with extra screws.
- Leave enough slack so you can still open your tailgate.
Add Some Extras (Optional)
Want to make it even better? Try these:
- Cut a piece of 1×4 or 2×3 to fit across the back of the bed.
- Screw this to the frame you made earlier.
- Wrap the tarp around this board and secure it. This gives a cleaner look at the tailgate.
Test It Out
Before you call it done, let’s make sure it works.
- Spray it with a hose to check for leaks.
- Open and close the tailgate to make sure nothing’s too tight.
- If you find any problems, now’s the time to fix them!
And there you have it! A super cheap tonneau cover that’ll keep your stuff dry without draining your wallet.
Video tutorial:
Some Tips
Whichever method you choose, here are some tips to keep in mind:
Take Your Time: This isn’t a race. It’s better to go slow and get it right than to rush and mess it up.
Measure Twice, Cut Once: Double-check all your measurements before you start cutting. It’s way easier to erase a pencil mark than to un-cut wood!
Ask for Help: If you get stuck, don’t be afraid to ask someone for help. Maybe your neighbor’s a DIY wizard, or your uncle’s handy with tools. Most people are happy to lend a hand (or some advice).
Stay Safe: Always wear safety glasses when you’re cutting or drilling. And be careful with power tools – they don’t care if they’re cutting wood or your finger!
Make It Your Own: These are just guidelines. Feel free to customize your cover. Maybe add some tie-down points, or paint it to match your truck. It’s your project, so make it yours!
Maintenance Matters: Once you’ve made your cover, take care of it. Check the screws or bolts every now and then to make sure they’re tight. If you went with the tarp method, keep an eye out for tears or wear.
Be Proud: When you’re done, stand back and admire your work. You just made something awesome with your own two hands. That’s pretty cool!
Final Thoughts
So there you have it, folks! Two ways to make your own tonneau cover without spending a ton of cash.
Whether you go for the fancy plywood version or the quick and easy tarp cover, you’re saving money and learning some new skills.
Plus, you get to tell everyone “I made that!” next time they admire your truck.
Remember, the perfect tonneau cover is the one that works for you. So pick the method that fits your budget, your skills, and your needs.
And hey, if you mess up the first time, don’t sweat it. That’s how we learn, right?
Now get out there and start building! Your truck (and your wallet) will thank you. Happy DIYing, everyone!
